Why Brake Pad Slap is Not Advisable
Brake pad slap refers to the quick and incomplete replacement of brake pads without addressing the overall condition of the entire brake system. This method typically skips crucial steps such as inspecting or replacing additional brake components, cleaning, and proper lubrication. Here’s why it's problematic:
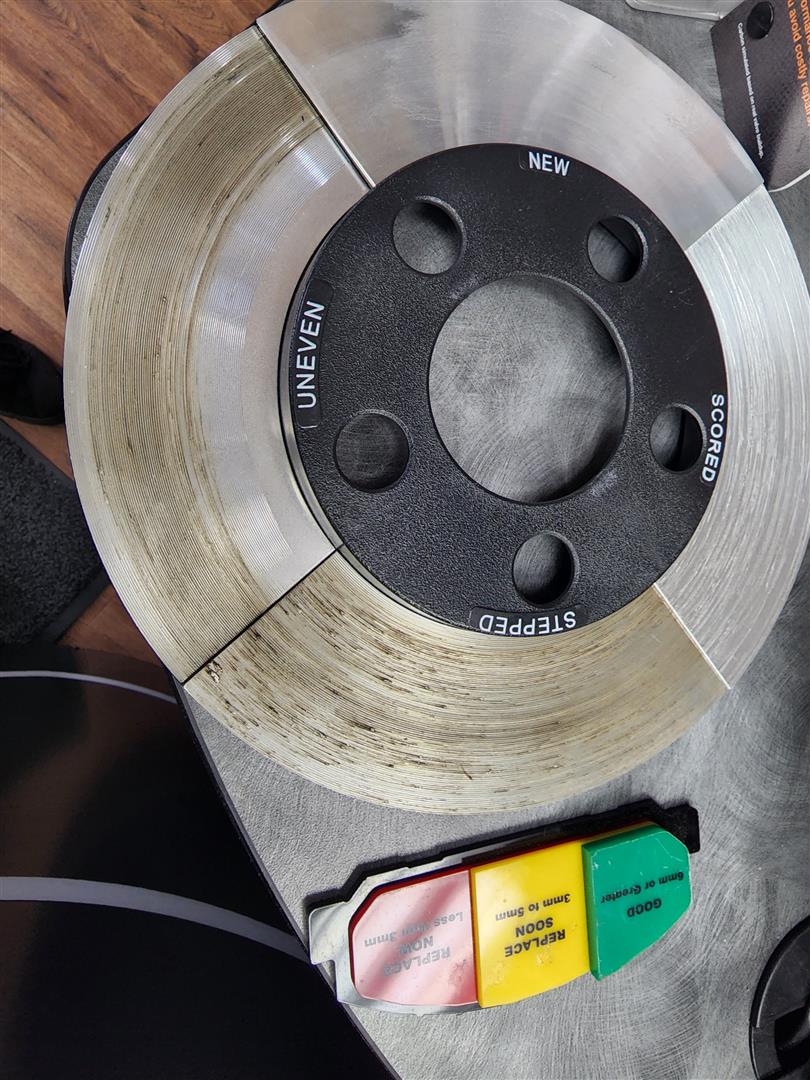
- Missed Component Wear and Tear: Skipping inspection of rotors, calipers, and other brake components can lead to unseen damage or wear, which may cause the new pads to wear unevenly or fail prematurely.
- Potential for Further Damage: Without resurfacing or replacing the rotors, new brake pads may not fit perfectly, leading to decreased braking efficiency and potential safety hazards.
- Short-Term Fix: Although initially cheaper and faster, this approach often leads to more frequent repairs and higher costs over time due to unresolved issues.
Steps for a Complete Brake Job
Performing a complete brake job involves several detailed steps to ensure safety and extend the lifespan of your brake system:
1. Preparation and Safety:
- Ensure the vehicle is on a flat surface, apply the parking brake, and lift the car securely using a jack and jack stands.
2. Wheel Removal:
- Remove the wheels to access the brakes.
3. Inspect Brake Components:
- Carefully examine the brake pads, rotors, calipers, and all associated hardware.
- Check for wear, warping, and damage. Measure the thickness of the brake pads and rotors to ensure they meet minimum specifications.
4. Replace or Resurface Rotors:
- If rotors are worn or warped, they should be resurfaced or replaced to ensure a flat mating surface for the brake pads. At 17th Street Automotive we replace with new rotors, instead of machining, since it takes extra labor and thins out the rotor even more, plus we remove human error when we replace with new rotors for the same or lower price
5. Replacing the Brake Pads:
- Remove the old brake pads and hardware.
- Clean the caliper thoroughly to remove any dirt or brake dust.
- If necessary, push the caliper piston back to make room for new brake pads using a caliper piston tool.
6. Lubrication:
- Apply high-temperature brake grease to the caliper pins and any areas where there is metal-to-metal contact but avoid getting grease on the rotor or pad friction material.
7. Install New Hardware and Pads:
- Install new hardware and brake pads. Ensure everything fits snugly and is aligned properly.
8. Reassemble Brake Assembly:
- Reattach the caliper and ensure all bolts are tightened to the manufacturer's specifications.
9. Bleed the Brake System:
- Bleed the brakes to remove any air bubbles in the brake lines, which can compromise braking efficiency.
10. Reinstall the Wheels and Test:
- Reinstall the wheels, lower the vehicle, and tighten the lug nuts to the correct torque.
- Perform a test drive to ensure everything is working properly. Start slowly, testing the brakes at low speed before trying higher speeds.
Importance of Experienced Technicians
Having a knowledgeable and experienced technician perform your brake job is critical for several reasons:
- Expertise: Professionals are trained to spot issues that are not immediately obvious and can perform repairs correctly.
- Safety: Brakes are one of the most critical safety components on a vehicle. Proper installation and maintenance directly impact vehicle safety.
- Warranty and Accountability: Work done by certified technicians often comes with a warranty and assures quality, offering peace of mind.
In summary, skipping crucial steps in a brake job can lead to poor vehicle performance, higher repair costs, and potential safety hazards. A thorough brake job, done by a competent technician, not only ensures long-term reliability but also guarantees the safety of the vehicle’s occupants and others on the road.